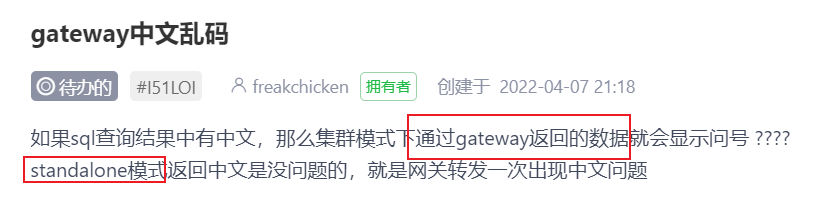
问题链接 gateway中文乱码
排查思路 初步分析 dbapi支持两种部署模式,一种是单机版(standalone模式),一种是集群版(gateway调apiserver版本).两种模式同一请求返回结果不一致,
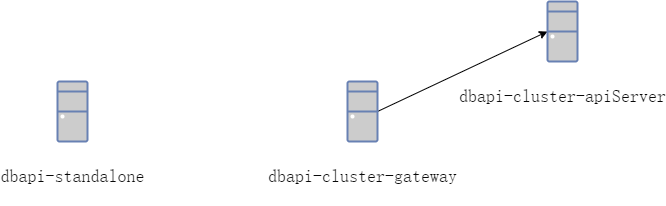
环境搭建
需要启动dbapi-standalone,dbapi-cluster-gateway,dbapi-cluster-apiServerdbapi-cluster-gateway,dbapi-cluster-apiServer需要通过nacos暴露服务
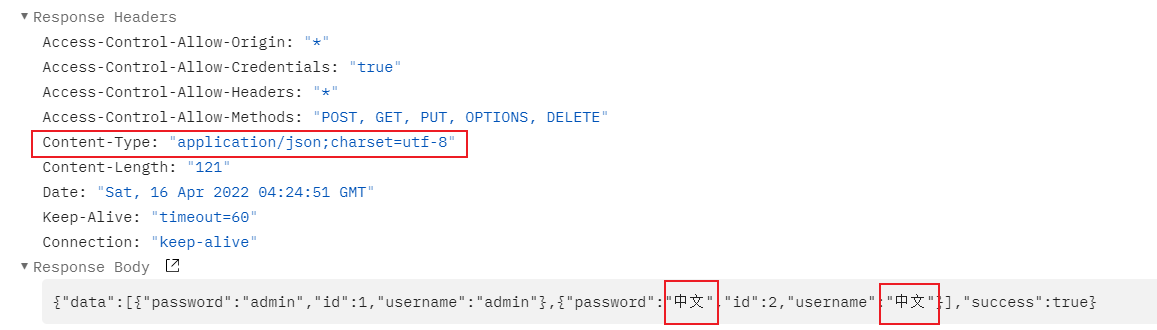
复现 在复现的时候,我发现的确如果返回值中存在中文,单机版返回正常,访问gateway返回的中文乱码。gateway最终也是调用的apiserver,所以我们直接调用apiserver,发现apiserver返回的中文乱码 apiserver造成中文乱码问题response的content-type正常,apiserver返回的response没有content-type
单机版返回response示例:
apiserver返回response示例:
因此我们怀疑是apiserver没有为response设置content-type造成中文乱码
代码分析 使用代码版本: dev分支:409a6cf2c0ec222946754d195846bb7023ca0c3b
使用关键字.setContentType(搜索,代码中为返回值设置response的地方共有6处,其中我们需要关心以下两个地方:
com.gitee.freakchicken.dbapi.basic.conf.JwtAuthenticationInterceptor
com.gitee.freakchicken.dbapi.basic.filter.ApiIPFilter
通过com.gitee.freakchicken.dbapi.basic.conf.MyConfig#addInterceptors发现JwtAuthenticationInterceptor主要校验前端UI,因此请求进来的时候起作用只能是ApiIPFilterapiserver,请求调用的时候没有经历这个ApiIPFilter,要么就是请求通过这个ApiIPFilter设置的response content-type没有效果
通过测试,发现当直接请求apiserver时并没有通过ApiIPFilter,通过分析apiserver代码,在com.gitee.freakchicken.dbapi.apiserver.DBApiApiServer的ComponentScan中排除了com.gitee.freakchicken.dbapi.basic.filter.ApiIPFilter
同时我们发现gateway存在com.gitee.freakchicken.dbapi.gateway.filter.GatewayIPFilter,应该是作者认为gateway存在了ip过滤,apiserver就不应该再过滤一遍ip,但是却忽略了response设置编码这一环
修复 添加一个统一的请求头过滤器com.gitee.freakchicken.dbapi.basic.filter.ApiHeaderFilter只针对dbapi.api.context配置的地址,同时调整注册filter与sevlet的代码结构
分别为:
com.gitee.freakchicken.dbapi.conf.FilterConfigipFilter order设置为1,authFilter order设置为2,apiHeaderFilter order设置为3(这里有坑,下面有解释)
com.gitee.freakchicken.dbapi.conf.ServletConfig
com.gitee.freakchicken.dbapi.apiserver.conf.FilterConfigauthFilter order设置为2,apiHeaderFilter order设置为3(这里有坑,下面有解释)
com.gitee.freakchicken.dbapi.apiserver.conf.ServletConfig
调试
发现单机模式下返回值正常,集群模式下返回值有content-type,但是content-type却不是我们设置的utf-8
集群模式下response
我将com.gitee.freakchicken.dbapi.basic.filter.ApiHeaderFilter#doFilter的代码改为1 2 3 4 5 6 7 8 9 10 11 String characterEncoding = response.getCharacterEncoding();System.out.println("设置CharacterEncoding前: " +characterEncoding); response.setCharacterEncoding("UTF-8" ); characterEncoding = response.getCharacterEncoding(); System.out.println("设置CharacterEncoding后: " +characterEncoding); String contentType = response.getContentType();System.out.println("设置ContentType前: " +contentType); response.setContentType("application/json; charset=utf-8" ); contentType = response.getContentType(); System.out.println("设置ContentType后: " +contentType);
发现response.setContentType与response.setCharacterEncoding不起作用
当请求单机版时发现输出为
1 2 3 4 设置CharacterEncoding前: utf-8 设置CharacterEncoding后: utf-8 设置ContentType前: application/json;charset=utf-8 设置ContentType后: application/json;charset=utf-8
当请求apiserver时发现输出为
1 2 3 4 设置CharacterEncoding前: ISO-8859-1 设置CharacterEncoding后: ISO-8859-1 设置ContentType前: null 设置ContentType后: application/json;charset=ISO-8859-1
下面就response.setContentType与response.setCharacterEncoding问题分为单机版与集群版两种模式下讨论FilterChain是不同的
单机版FilterChain
当请求单机版时,apiIPFilter在apiHeaderFilter之前,因此此时apiHeaderFilter设不设置无所谓
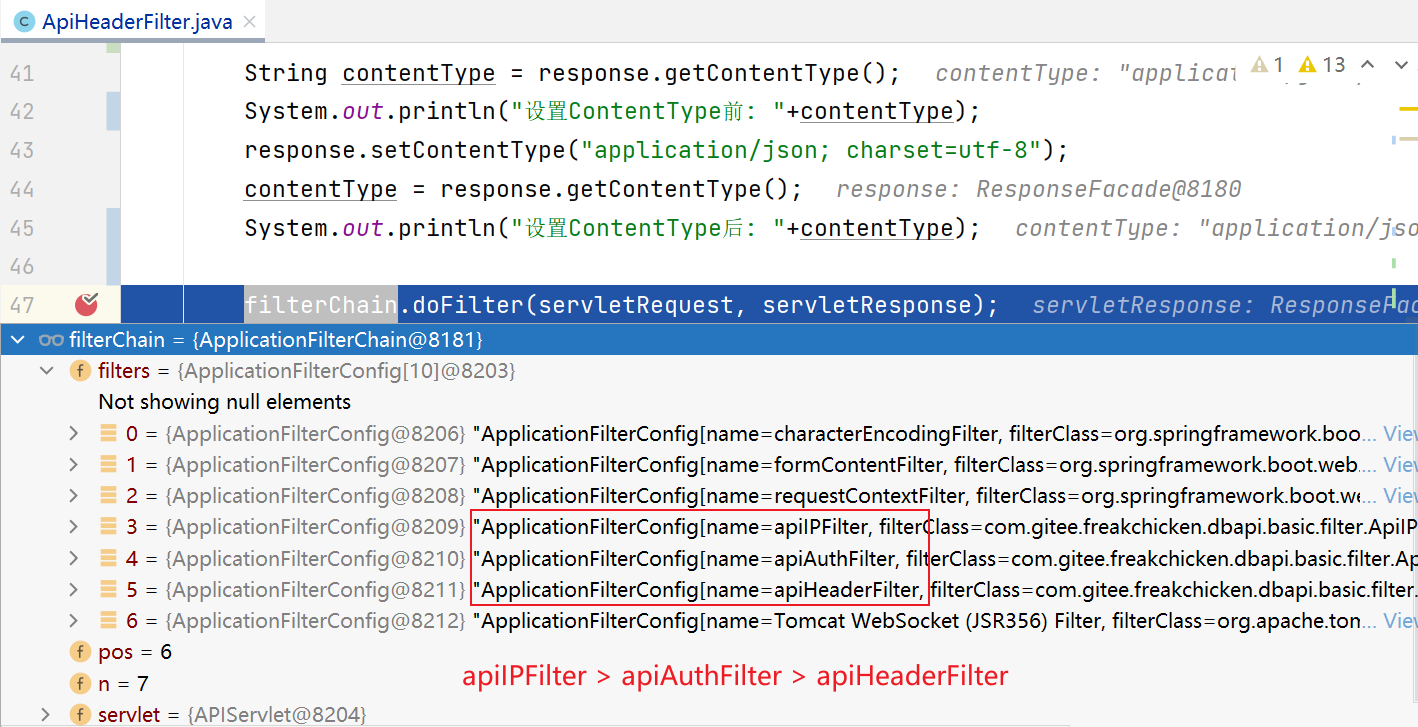
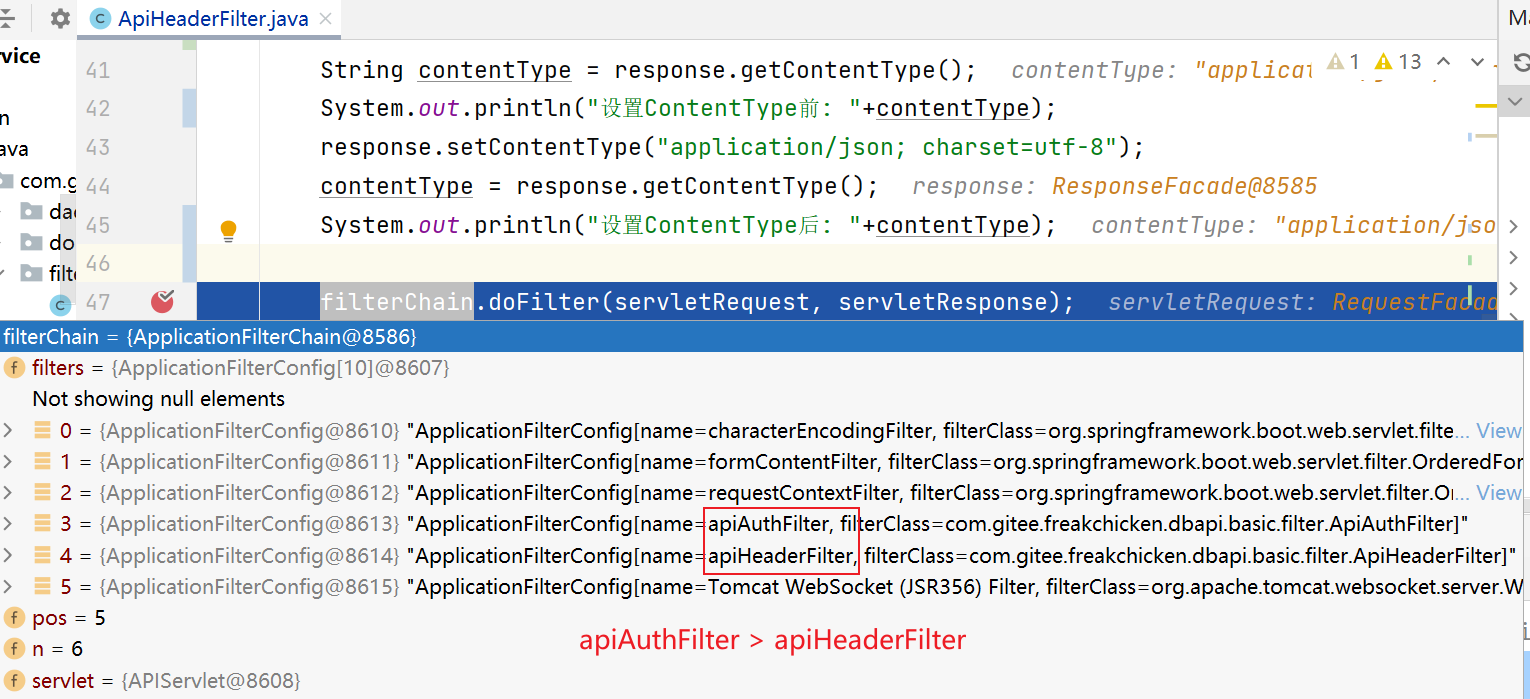
集群版FilterChain
当请求集群版时,apiAuthFilter在apiHeaderFilter之前,此时apiHeaderFilter再设置就不起作用了
通过断点调试,发现在apiAuthFilter的response.getWriter()时会setCharacterEncoding,而这个set的值就是ISO-8859-1,同时org.apache.catalina.connector.Response在设置完编码后会将usingWriter设为true导致下次设置就不会起作用
这告诉我们不使用writer的时候不要提前获取response的writer,否则无法在后续filter中设置编码 ,同时设置response的编码最好放在第一个
按照这个原则,我们再次修改代码,调试提交